Bluesky Bottle Bluesky Bottle

Top 10 Ways to Prevent Mold in Plastic Bottles

Time:2026-10-13 Author:Sophia
0%

Mold thrives where moisture, warmth, and trapped residue meet. A plastic bottle can provide all three conditions after one careless rinse. The mouthpiece, cap threads, silicone seal, and straw often stay wet longest. They also collect saliva, sugar, and microscopic food particles.

The U.S. Environmental Protection Agency explains that mold can grow on damp materials within 24 to 48 hours. The Centers for Disease Control and Prevention recommends controlling moisture and drying wet surfaces quickly. These principles apply directly to reusable bottles. Research published in the Journal of Exercise Rehabilitation also found that reusable water bottles can carry substantial microbial contamination when cleaning is inadequate. Mold is only one part of the problem.

Small details matter.

This guide, “Top 10 Ways to Prevent Mold in Plastic Bottles,” translates those findings into practical habits. It explains How to prevent mold in plastic bottles through thorough washing, complete drying, correct storage, and regular inspection. You will learn why rinsing alone fails, why narrow openings need dedicated brushes, and why damaged seals deserve replacement. NSF International’s food-equipment hygiene standards also emphasize cleanable surfaces and effective sanitation, principles that support safer bottle care.

No routine is perfect. Even careful users may overlook the cap gasket or leave a bottle in a warm car. That weakness deserves attention, not embarrassment. A clean-looking bottle may still hide residue beneath its seal. Consistent cleaning reduces risk, but it does not guarantee sterility. When odor, discoloration, or slimy film appears, stop using the bottle until every removable part is cleaned and fully dried.
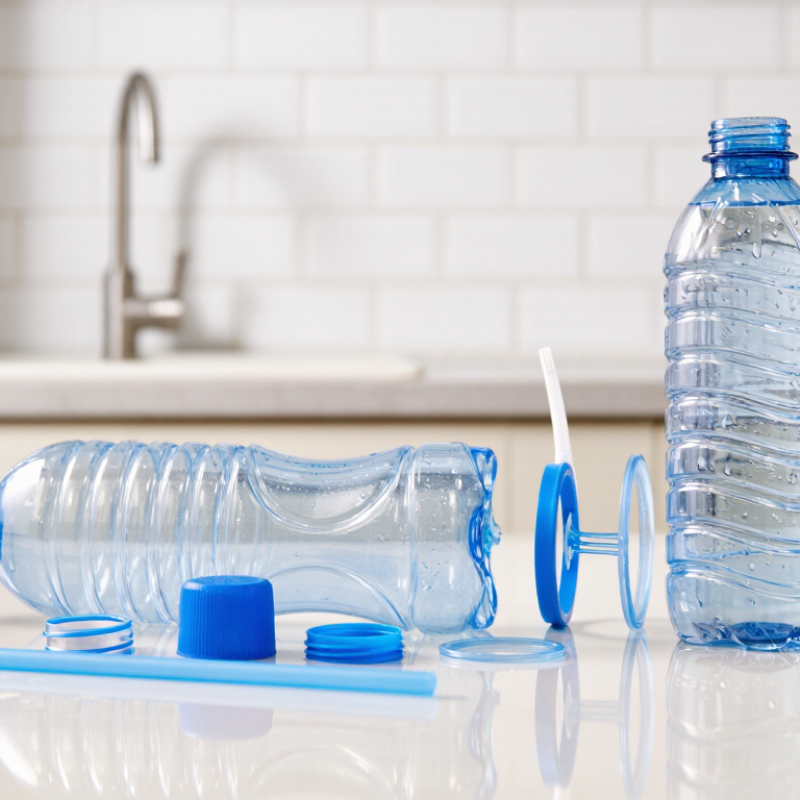
Top 10 Ways to Prevent Mold in Plastic Bottles

Define Mold Risk Through Water Activity Below 0.80

Top 10 Ways to Prevent Mold in Plastic Bottles

Water activity, or aw, measures available moisture rather than total water content. The FDA Food Code commonly uses 0.85 aw as a safety boundary for controlling many pathogens. Mold is more adaptable. ICMSF guidance shows that some molds can grow below 0.80 aw, especially in sugary or acidic residues. Therefore, below 0.80 should be treated as a risk-reduction target, not a guarantee.

Plain drinking water usually has aw close to 1.00. That makes moisture control alone unrealistic inside a filled bottle. Mold prevention depends on removing nutrients and stopping residue buildup. Rinse bottles immediately, scrub threads and cap liners, and dry them upside down with airflow. Never seal a damp bottle for long storage. A faint sweet smell can signal residue before visible growth appears.

For powders, concentrates, or partially dried materials, test aw with a calibrated meter. Use certified reference standards before measurement, and test the thickest residue, not only the liquid surface. Keep reusable bottles away from warm windows and inspect them weekly. Replace scratched containers, because microscopic grooves can shelter biofilms. The U.S. Department of Agriculture notes that temperature, time, and moisture interact during microbial growth; a cool bottle can still develop mold when residues remain. I sometimes overtrust a “dry-looking” surface. That judgment is imperfect. Data and cleaning records are safer.

Choose FDA-Compliant, Nonporous Plastic Bottle Materials

Top 10 Ways to Prevent Mold in Plastic Bottles

Choose FDA-Compliant, Nonporous Plastic Bottle Materials

Mold needs moisture, residue, and time. The bottle material can reduce these risks significantly. Choose nonporous plastics, such as PET, HDPE, or polypropylene, when they suit the product. Their smooth surfaces resist absorption and make cleaning more consistent. However, plastic type alone does not prove safety. Confirm that the exact material, additives, colorants, and intended use meet applicable FDA food-contact requirements. Request current compliance documents and production records from the supplier. Details matter.

In routine bottle evaluations, I look closely at seams, threads, closures, and inner corners. These areas can trap droplets and organic residue. Select designs with fewer crevices and a smooth interior finish. Avoid heavily scratched bottles. Scratches may hold moisture and become difficult to sanitize. Wash bottles promptly, rinse away detergent, and dry them completely before storage. Keep caps open while drying. Do not reuse a bottle longer than its condition allows. A small mistake matters.

Tips: Store empty bottles in a clean, dry area. Inspect them under bright light before filling. If you notice odor, discoloration, or persistent residue, replace the bottle. Also, review cleaning procedures regularly. They may look effective but still miss the closure or thread area.

Clean Bottles at 60°C or Above and Remove Biofilm Daily

Mold prevention begins with daily biofilm removal, not occasional rinsing. Biofilm is the slimy layer that lets microorganisms cling to bottle walls, threads, and caps. The WHO Guidelines for Drinking-water Quality, 2022, explain that biofilms can protect microorganisms from ordinary cleaning. In practice, I wash bottles after every use, remove the gasket, and scrub hidden grooves with a narrow brush. A quick rinse is rarely enough.

Use water at 60°C or above when the plastic manufacturer permits it. This heat softens residue and improves detergent action, but it does not guarantee sterilization. The FDA Food Code 2022 specifies 77°C for 30 seconds in certain manual hot-water sanitizing procedures. That comparison matters. A warm kitchen rinse is not the same treatment. Never force high heat onto plastic that may warp, crack, or release odors. Check the care instructions.

Dry every part separately, with the cap open and the bottle upside down. Damp darkness encourages regrowth. The National Academies’ food-safety guidance repeatedly emphasizes cleaning, drying, and preventing cross-contamination as linked controls. I still make mistakes: leaving a bottle in a gym bag overnight is easy. That habit needs correction. Replace scratched or cloudy bottles, because damaged surfaces are harder to clean thoroughly. If mold remains after repeated washing, discard the bottle and its seal.

Dry Every Component Below Mold-Friendly Humidity Levels

Top 10 Ways to Prevent Mold in Plastic Bottles

Dry Every Component Below Mold-Friendly Humidity Levels

Mold needs moisture, warmth, and time. A bottle may look clean while droplets hide beneath the cap or inside the gasket. Dry every component separately, including the lid, seal, straw, and threads. These small areas often retain water after rinsing.

After washing, shake out excess water and place each part on a clean drying rack. Keep the bottle open and upside down, but allow airflow around its opening. Leave the cap and gasket beside it, not inside the bottle. Use a narrow drying brush for deep necks and corners. Do not seal the bottle while any surface feels cool or damp.

The practical target is a completely dry interior, with storage air below mold-friendly humidity levels. Ideally, keep the storage area below 60% relative humidity, preferably near 50%. A small hygrometer can reveal a damp cupboard that feels normal. In humid weather, a fan helps, but forced heat may warp some plastics. Check the material’s care guidance.

I used to close bottles too soon. That shortcut caused a stale smell within days. Drying took longer than expected, especially around the gasket. Some routines still fail when the rack is crowded. Leave space between parts, inspect hidden grooves, and repeat the process when moisture returns.

Replace Bottles Under NSF/ANSI 51 and Manufacturer Hygiene Guidance

Top 10 Ways to Prevent Mold in Plastic Bottles

Replace Bottles Under NSF/ANSI 51 and Manufacturer Hygiene Guidance

NSF/ANSI 51 evaluates materials used in food equipment, including their suitability for food contact. It does not provide a universal replacement schedule. Treat it as a safety baseline, not a countdown clock. The FDA Food Code also emphasizes smooth, durable, and easily cleanable food-contact surfaces. Deep scratches, cloudy plastic, loose seals, and damaged threads can defeat that principle.

Replace a bottle when its manufacturer’s hygiene guidance says to do so. Follow earlier replacement advice if the bottle develops a persistent odor, visible staining, or cracked seams. Mold often hides beneath caps and inside silicone gaskets. Those parts need separate washing and complete drying. A closed, damp bottle creates a quiet habitat. EPA guidance notes that mold may grow within 24 to 48 hours when moisture remains.

Wash bottles after each use with warm water and detergent. Let every component air-dry separately. Do not rely on rinsing alone. High heat, harsh chemicals, or abrasive brushes may damage plastic and shorten its useful life. A bottle can look clean while retaining microscopic residue. That is the uncomfortable part. Keep a replacement date on a simple inspection log, then compare it with the written manufacturer guidance and current facility procedures. In practice, replacing slightly early may be wiser than stretching an uncertain service life.

FAQS

How often should I clean a reusable plastic bottle?

Wash it after every use. Daily biofilm removal matters more than occasional rinsing. Slimy residue can hide on walls, threads, and caps.

Is a quick rinse enough?

Usually, no. Rinsing may leave residue inside grooves and beneath the seal. Scrub those areas with detergent and a narrow brush.

Can hot water help prevent mold?

Water at 60°C or above can improve residue removal, if the plastic allows it. Heat does not guarantee sterilization. Check the care instructions first.

Can high heat damage a plastic bottle?

Yes. Excessive heat may warp plastic, create cracks, or cause unusual odors. Never guess the safe temperature.

How should I dry the bottle after washing?

Shake out excess water and place the bottle upside down. Keep the cap, gasket, straw, and seal separate. Air must reach every surface.

Why does the bottle smell stale after cleaning?

Moisture may remain beneath the cap or inside the gasket. Closing the bottle too soon encourages regrowth. I still make that mistake sometimes.

What storage conditions reduce mold risk?

Keep the interior completely dry before storage. A storage area below 60% relative humidity is helpful, with around 50% preferable. A small hygrometer can reveal hidden dampness.

When should I replace or discard the bottle?

Replace scratched, cloudy, cracked, or damaged bottles. These surfaces are harder to clean fully. If mold remains after repeated washing, discard the bottle and its seal.

Conclusion

How to prevent mold in plastic bottles starts with controlling moisture, residue, and microbial buildup. Keep water activity below 0.80 where applicable, and choose FDA-compliant, nonporous plastic materials that are less likely to retain moisture or odors. Clean bottles, caps, straws, and seals daily with water at 60°C or above when the material safely permits it, and remove biofilm from seams, threads, and hard-to-reach areas. Regular cleaning helps prevent organic residue from creating a surface where mold can grow.

After washing, dry every component completely and store the bottle in a well-ventilated place with humidity below mold-friendly levels. Do not reassemble parts while they are still damp. Finally, replace bottles and removable components according to NSF/ANSI 51 considerations and the manufacturer’s hygiene guidance, especially when they show cracks, persistent odor, discoloration, or surface damage. A consistent routine of inspection, cleaning, drying, and timely replacement provides practical protection against mold development.

Sophia

Sophia

Sophia is a dedicated marketing professional with an exceptional depth of knowledge about her company's products and services. With a keen understanding of market trends and customer needs, she crafts insightful blog posts that not only inform but also engage readers, enriching the company’s online......