Bluesky Bottle
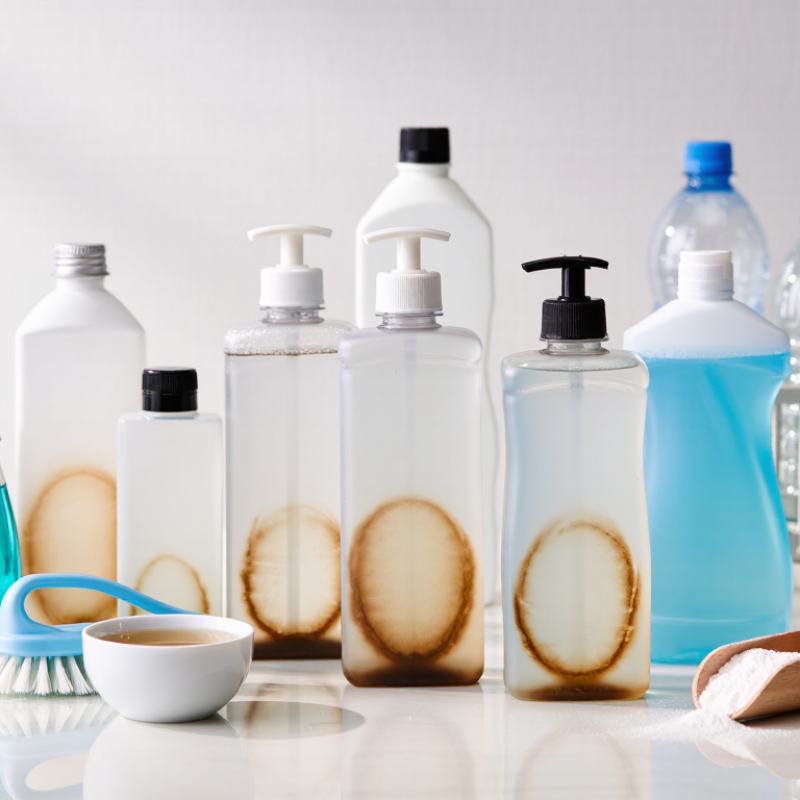
Plastic bottles are convenient, but coffee, tea, juice, and lingering odors can leave stubborn marks inside. A cloudy ring near the bottom may remain even after a quick rinse. How to remove stains from plastic bottles depends on the stain, the bottle’s condition, and the care instructions from its manufacturer. There is no single method that works equally well for every plastic. Small details matter.
This guide covers practical cleaning options, including warm water, dish soap, baking soda, and bottle brushes. It also explains when soaking may help and when a stain is only cosmetic. Gentle methods are usually a sensible place to start. Abrasive scrubbers and harsh chemicals can scratch or damage some plastics, so check the bottle’s care label and test a cleaning method carefully. Rinse thoroughly, then let the bottle dry completely with its cap off.
Some stains may not disappear. That can be frustrating. A faded color or persistent odor could mean the bottle needs replacing, especially if it is cracked, scratched deeply, or difficult to clean. This guide is not a substitute for the manufacturer’s instructions, and results can vary with age and material. A little trial and error may be needed; honestly, even careful cleaning cannot restore every bottle to its original clarity.
Before treating a stain, check the small number molded into the bottle, often on its base. ASTM D7611 defines seven resin identification codes: 1 for PET, 2 for HDPE, 3 for PVC, 4 for LDPE, 5 for PP, 6 for PS, and 7 for other resins. The code identifies the plastic type; it does not guarantee that the bottle is recyclable locally. That matters.
For routine stains, start with warm water, mild dish soap, and a soft bottle brush. Let the soapy water sit for a few minutes, then gently scrub the stained area. PET and HDPE bottles are common, but their heat tolerance can differ by design. Avoid boiling water unless the manufacturer’s care instructions allow it. Abrasive pads and strong solvents may scratch, cloud, or weaken plastic. Not a guarantee.
If the code is missing, unreadable, or marked 7, use a cautious approach: test your cleaning method on a small, hidden spot first. A tea ring may fade after soaking, while deeply absorbed color can remain in the plastic. That can feel frustrating. Don’t keep scrubbing harder; rough surfaces can trap more residue and make later cleaning less effective. Rinse thoroughly and let the bottle dry with its cap off.
A clean-looking bottle is not necessarily a safe one, so replace it if it has cracks, persistent odors, or damage that cannot be cleaned.
2026 Best Ways to Remove Stains from Plastic Bottles?
Check the Maker’s Heat Limit; Resin Codes Alone Do Not Confirm Dishwasher Safety
Before using heat, check the bottle maker’s care instructions. A resin code identifies the plastic type, but it does not confirm that the bottle can handle a dishwasher’s heat. Lids, seals, and printed markings may have different limits. Check the manual. If guidance is unclear, use cool or lukewarm water instead of guessing.
For fresh stains, rinse promptly, then soak the bottle in warm water with mild dish soap. Use a soft bottle brush to reach the base and shoulder. For lingering discoloration, try a paste of baking soda and water; rub gently, rinse well, and air-dry with the bottle open. Avoid scouring pads, which can scratch plastic and leave places for residue to collect. A faint tint may remain. Chasing perfect clarity can cause more wear than it is worth.
Tips: Test gentle cleaning on a small area. Skip boiling water and high-heat cycles unless the maker says they are safe. Don’t mix cleaning products.
Before targeting a stain, empty the bottle and rinse it with warm water. Add a few drops of dish soap, then scrub the inside with a bottle brush. Use short strokes around the base, where residue often settles. Don’t skip the narrow neck. Brush the threads from several angles, since dried drink can hide between them. If the cap has a removable seal, take it out and wash both sides separately. Rinse until the water runs clear. A quick rinse alone can leave a slippery film.
Tool hygiene matters. NSF International’s 2011 household germ study found coliform bacteria on 75% of the kitchen sponges and dishcloths tested. Use a clean brush, and let it air-dry between washes. For a tight seal groove, a small, clean brush can reach better than a large bottle brush. Check the bottle’s care instructions before using hot water; some plastics can warp. I have missed the threads before, and the faint odor returned. That is a useful reminder: prewashing is not just about the visible stain. A thorough soap-and-brush wash removes surface residue before any stain treatment begins.
A practical prewash routine: use dish soap and a bottle brush to reach the bottle threads and seal.
How to use this guide: Rinse for about 1 minute, scrub with dish soap and a bottle brush for about 2 minutes, soak for about 10 minutes if needed, then rinse for about 1 minute. These are suggested starting times, not lab-tested stain-removal results; stubborn stains may need more attention.
Tea and coffee can leave brown rings inside plastic bottles, especially around the shoulder and beneath the lid. Empty the bottle and add warm water with one or two tablespoons of baking soda. The exact amount is not critical; aim for a loose, cloudy mixture rather than a thick paste. Let it sit for 15 to 30 minutes. Then use a soft bottle brush to gently work over the stained areas. Keep the pressure light. Hard scrubbing can scratch plastic, and scratches may hold odors or residue. A little patience helps.
For a narrow bottle, swirl the mixture so it reaches the sides, then brush where possible. Empty it and rinse thoroughly with clean water several times, including the threads and cap. No gritty residue should remain. Still stained? Repeat the soak once rather than reaching for boiling water or a rough scouring pad, which may damage some plastics. Check the bottle’s care instructions if available. Baking soda can reduce fresh discoloration, but older stains may not disappear completely. That can be disappointing. Remove any straw or gasket, wash those separately, and leave all parts open to air-dry fully before storing.
| Stain or Residue | Suggested Cleaning Method | Steps | Suggested Contact Time | Important Notes |
|---|---|---|---|---|
| Tea and coffee stains | Baking soda paste and warm water | Mix baking soda with enough water to form a paste. Apply it to the stained area and gently scrub with a soft bottle brush or non-scratch sponge. Wash with dish soap and rinse thoroughly. | About 10–15 minutes before gentle scrubbing | Avoid abrasive pads, which can scratch plastic and make it harder to clean. Repeat if needed rather than scrubbing forcefully. |
| Everyday drink residue | Warm water and dish soap | Take the bottle apart if its design allows. Wash the bottle, cap, and removable seals with warm soapy water, using a soft brush to reach narrow areas. Rinse all parts well. | Wash promptly; soak briefly if residue has dried | Check the care instructions for the bottle and its components. Some lids or seals may require hand-washing. |
| Cloudy mineral deposits | Diluted white vinegar, if permitted by the care instructions | Fill or soak the affected area with a mixture of equal parts white vinegar and water. Wash afterward with dish soap and rinse thoroughly. | About 10–15 minutes; avoid prolonged soaking | Do not use vinegar if the bottle manufacturer advises against it. Never mix vinegar with bleach or other cleaners. |
| Greasy or oily film | Dish soap and warm water | Add dish soap and warm water, close the bottle, and shake gently. Use a soft brush for the inside, then rinse until the surface no longer feels slippery. | A few minutes of washing; repeat if residue remains | Avoid very hot water unless the bottle is rated for it, as heat can deform some plastics. |
| Lingering odor | Baking soda and water | Place a small amount of baking soda in the bottle, add warm water, and let it stand. Wash with dish soap, rinse thoroughly, and leave the bottle open to air-dry. | Several hours or overnight | Odor may persist if residue remains in the cap, gasket, or scratched surfaces. Clean removable parts separately. |
| Persistent discoloration or unknown residue | Use the bottle’s care instructions; replace if necessary | Try a gentle wash with dish soap and a soft brush. If the stain remains, check the bottle maker’s cleaning guidance rather than using solvents or harsh scouring products. | Follow the care instructions | Discard a bottle that is cracked, deeply scratched, warped, or still has an unusual odor after cleaning. |
For tea, coffee, or juice stains, start with warm water, dish soap, and a soft bottle brush. Let the soapy water sit briefly, then brush the shoulder and base, where residue often clings. Rinse thoroughly.
A fading stain is not proof of sanitation, and a spotless bottle is not automatically safe. It is easy to focus too much on appearance.
After cleaning, use a sanitizer labeled for food-contact surfaces and suitable for the bottle’s plastic. FDA 21 CFR 178.1010 covers certain sanitizing solutions for food-contact surfaces; follow the product label for dilution, contact time, rinsing, and drying. Do not guess the concentration.
CDC estimates about 48 million foodborne illnesses occur in the United States each year, underscoring why careful food-contact hygiene matters. Small details matter.
Tips: Check the bottle’s care instructions before using hot water or a sanitizer; some plastics can warp or cloud. Keep the surface visibly wet for the full label-specified contact time. If odor or staining persists after washing, inspect the cap threads and seals too. They are easy to miss.
Empty it, rinse with warm water, and add a few drops of dish soap. Scrub the inside with a clean bottle brush.
Brush the base, narrow neck, and cap threads from several angles. Residue often hides there.
Take it out and wash both sides separately. Use a small, clean brush for tight grooves.
No. A fading stain does not prove the bottle is sanitized. Looks can mislead.
Use a sanitizer labeled for food-contact surfaces and suitable for the bottle’s plastic. Follow its directions for dilution, contact time, rinsing, and drying.
Check the bottle’s care instructions first. Some plastics can warp or cloud, so avoid guessing.
Keep the surface visibly wet for the full time stated on the label. Small details matter.
Inspect the cap threads and seal, then wash those areas again. I have missed the threads before; the odor returned. A useful reminder.
How to remove stains from plastic bottles starts with identifying the plastic and checking the maker’s heat limit. ASTM D7611 assigns seven resin identification codes, but those codes alone do not confirm that a bottle is dishwasher-safe, so follow the care instructions provided with the bottle and avoid exposing it to unapproved heat.
First, wash the bottle with dish soap and a bottle brush, taking care to reach the threads and seals where residue can collect. For tea or coffee stains, gently scrub with baking soda and rinse thoroughly. If sanitizing is needed, use a solution intended for food-contact surfaces and follow its label directions, including any required dilution, contact time, and rinsing instructions.
